Saturday, September 15, 2007

Hello out there!

This blog will document my current project at the Evergreen State College in Olympia, Washington. I am working with professor Bob Woods to create a charcoal-fueled grill of steel and aluminum. In the coming weeks you will see my sketches, blueprints, and thoughts, and once I begin construction I will post entries with photos regularly. I've just begun to study metalworking, and I hope the details and techniques will be as interesting to you as they are to me. Please give feedback, and enjoy the site!

The Grill - Technical Drawing


Here is my technical drawing. It's more or less final, but I'm still working on a few design issues. I want the side table to fold out, so the grill is more compact when stored. It should also be sturdy and without wobble when it is extended. It's hard to get both. I've settled on a system with a free hinge and two support rods that lock into the table when it is out, sort of like the rod that holds up a car hood. It will work, but I'd like a more elegant solution. Bob Woods, my instructor, suggested that there are prefab hinged arms to do just this task. Fortunately, the table will be one of the last parts I build, so I have plenty of time to figure this one out.

Beginning the Grate

I had planned to build the actual grill body first, but we were low on sheet steel, so I have to wait until next week. Same with 1-1/4" square pipe for the frame. So I decided to start off building the grate.


I can't remember the name of this tool, but it sure can bend 1/4" rod.


Unfortunately, it's a bit hard to figure out exactly where the bend will come out... I made one side about half an inch too long.


Straightening it out to try the bend again. Thanks, vise!


There we go.


I welded and ground the gap. It's not the most beautiful joint ever, but it'll get the job done. Now I've got to cut loads of 17-inch rods to make the cooking surface.


I improvised a jig to stop the rod at the correct length, so I can cut them all without measuring every time. The abrasive disc chop saw is not the most elegant tool- it leaves a rough edge and throws off tons of hot sparks. On the other hand, it's a lot faster than a band saw or bolt cutters. I measured the rods a quarter-inch too long, so I can get them down to exactly equal length with the grinder.


Awww yeah.

That was it for my shop time on Saturday. I was hoping to get the whole grate welded together, but I will have to finish it next time. After I put these rods on, I will make some handles for it and then move on to the grill body.

Finishing the Grate

Last time I rough-cut the rods for my grate, but I needed to get the ends looking better. Thus, BEHOLD!....

My ghetto rig to hold them in place so I can grind them all at once, to exactly the same length. Man, I really like those long-jawed vice grips.


Lookin' Good...


Bob suggested I add a middle bar for stability. It hadn't occurred to me, but it was a good idea. I checked out an old Weber grill that's lying around the metal shop, and sure enough, it had some crossbraces. It was a quick and easy procedure to cut the right length and weld it in.


I used a chisel to punch some indentations every 3/4 inch, where all the rods will go. I figured they would sit there and not roll around, so I could do my welding a lot faster. Don't have a heart attack about the chisel - I sharpened it afterward.


Turned out pretty good... the assembly was very fast using MIG welding.


Finally, I added some handles and sandblasted the whole thing, to get rid of all the oil and welding residue. I am going to be eating off this thing, after all! Next time, I will start building the grill body, so stay tuned!

Fabricating the Grill Body

Whew! It's been a while since I last posted. My life has been fairly hectic recently- moving into a new apartment, lots of schoolwork, etc. But I've made plenty of progress on the grill. First, cutting and preparing the sheet:

This hydraulic shear cuts 16 gage steel effortlessly. I used one 4x4 foot sheet, plus a few smaller pieces lying around.


Finished cutting all the pieces. This pile of sheet is pretty heavy-- the whole grill is going to weigh a LOT.


This sheet is going to become one of the long, curved sides of the body. Watch the roller do its thing...


And there you have it! But nothing is as easy as it seems. It turns out that while the roller bent my sheet admirably across the short side, it also put a slight unwanted bend on the long side.


You can see it's bulging up pretty badly. Only later did I learn that this is common with bending big sheets. The roller has to be set up just right. There are controls on either side that must be exactly equal, and it's tough to do that on this particular machine, because the gauges are not accurate.

Eventually, I figured out a way to solve this problem: brute force. I jumped up and put all my weight on the corners. It flattened them out a bit and equalized the curve across the sheet.

Fabricating the Grill Body, pt.2

So now I've got all my sheets set up-- it's time to start welding.


I stand the two curved sides against the end piece and mark off where it needs to be cut. As you could tell from my last post, my bends came out badly and I had to wrangle them into shape by hand. Now they're more than a little irregular, so it's important that I cut to how they actually are, not some mathematical ideal.


I made a rough cut on the band saw, but I didn't go all the way to the line. I'm not good enough yet. Our saw is kind of old and beat up, so it doesn't track very well. I'll get it exactly right with a pedestal grinder.


Lookin' good... by the way, that white line was drawn incorrectly. The real line I was using was scratched in with a marking tool, so it didn't show on camera.


One end tacked on. It's surprising how strong those little spots of weld are! Before I attach the bottom piece, I need to cut a hole for ash disposal purposes. It's a pain in the neck to cut sheet once it's welded into a shape, so I decided to bust out the plasma cutter.


A four inch square hole, ready for me to weld a tube and ash box later on.


The whole thing minus one side. I wanted to put this much together before I cut the other side piece, to account for any variation from the plan. It worked out well.


Every seam fully welded. They're kind of ugly welds, but once I grind everything down, it will look fine.

Fabricating the Grill Body, pt. 3

So I've got the grill bowl welded; now it's time to make the lid. This is a little more complicated. I need a handle on the front, and some holes that I can open and close for smoking. If you've seen a Weber grill, they have a little rotating disc with four holes. If it lines up with the holes in the lid, you've got ventilation. If it doesn't, you don't. You can sort of see it in this photo:

Simple enough, right? But not that easy to make, as you will see...


I decided I would make my vent out of brass, because it looks cool and doesn't rust. I cut the shape out with the band saw and perfected it with the grinder. I taped it onto the lid piece, so I could drill through both at once and get the holes aligned perfectly.


Well, that sure came out shitty. The larger hole is completely crooked, not even close to round. The smaller one is smaller because I gave up halfway through. Either my drilling technique is flawed, or our equipment is trashed.


A punch didn't work either. Not even close.


I could have tried a lot of other ways to make this work, but I'm time-limited on this project. I decided to cut a big hole around the failed attempts. I'll figure out a way to make it open and close later. It will probably be a sliding cover.


Aaaaaaand, here is the lid all finished. It lines up well with the bowl; everything is looking OK so far. Next week I will build a hinge and handle. Hopefully I will have time to get a cover on that vent too.

1 Forward, Two Back

So this is where I'm at right now: I need to hinge the lid to the grill body.:

Easier said than done. When I tried to align them, I realized that both had warped significantly because of the heat from welding. It would be impossible to make them line up; the gaps were over 1/8" in some places. Unacceptable. So I figured I would make an overhanging lip from angle irons, to hide the gap and make a (mostly) airtight seal.


Something like this.


This is what it would look like, not actually welded yet. There are still gaps, but they're smaller, and it looks much more professional.

It was not to be though. I tacked the lip and everything was gravy. (Tacking means welding a few tiny spots, just enough to hold the pieces in place. Then you go back through and weld the whole seam.) However, after laying down the full weld, I realized the tacks had BROKEN and there was a big ol' gap between the lip and the lid. Once again I underestimated warpage. The weld is too strong now; there is no way for me to break off the lip without destroying the lid itself. I will now have to go back and build ANOTHER lid. *sigh*... It'll take a lot of work to finish this on time. I will attempt to get back to where I was in one day, and then get the hinge built. Next time...

Grindin'

After last week's setback, I decided that I had to figure out a way to make it work without rebuilding the entire lid (please read last post for details). The angle-iron lip was attached properly on one side of the lid, it had only came separated on the other half. With help from a grinder, chisel, and lots of brute force, I managed to remove the offending part, leaving me with what you see below:

It looks like I just need to redo the other half.


There were some blobs of weld left over from the part I had removed. I ground them down to make sure they would not get in the way.


Here is the joint between the original lip and the new half. It came out pretty good, or perhaps "good enough".


And here is the new corner. It's ugly! I thought it would be wise to grind away all the slag from my welds before I try to build the hinge. It's best to do your grinding while you can still move the pieces around however you want.


Nice looking corner on the lid.


That was a LOT of work. This pile of filings must weigh half a pound! After I finished grinding I noticed that somewhere along the way I had taken a notch out of my pants leg, and it had gone through and shaved some plastic off my cell phone! Better it than me, I guess...

On another note, a bad flu has been sweeping through Evergreen. I caught a mild case, and while it didn't prevent me from doing all this work, my mind is kind of clouded. So I decided not to make a major decision about how to construct the hinge right now. My next work session is on Saturday, and I should be all better by then.

Starting the Frame

I started this workday thinking about what I have left to do. Though I have accomplished a lot, I have plenty left to do. Here is the list:

  • Assemble the frame that will hold everything up from square tubes.
  • Attach wheels
  • Attach a handle
  • Make Flanges inside grill bowl to hold up grates, and flanges on frame to hold up grill bowl
  • Make a table that folds out
  • Build ash catcher system
  • Make a box for charcoal and a cabinet for tools (optional)
  • Figure out a functional vent (for smoking)
  • Hinge the lid to the bowl.
  • Paint everything.
...And I have SIX more days in the metal shop. Time to hustle...


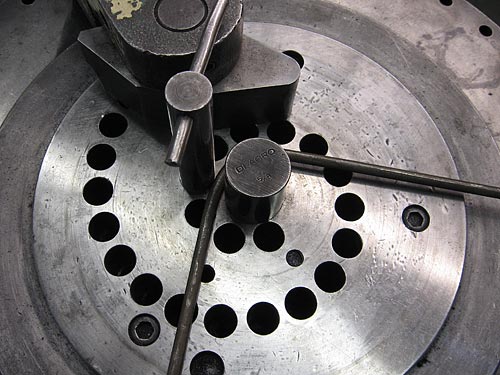
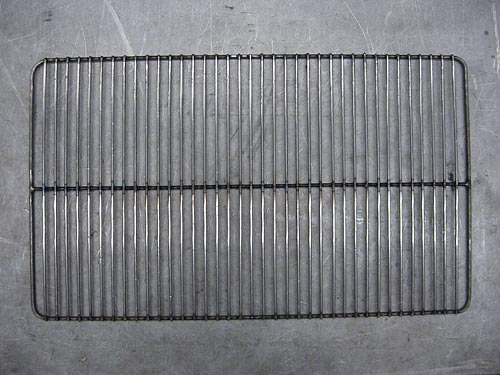
So I was thinking about how to hold up the grate, and I realize that its handles angle out and make it too wide.


Not a big problem- I'll have to break those welds. I decide to heat them up with an oxy-acetylene torch, so I can bend it in instead of cutting and re-welding.


but to my surprise, it just came off!


No big deal, I just re-weld in the right place.


After I finished that small tweak, I decide to start constructing the frame. I have reserved a full 20 foot length of 1-1/4" square tube for this purpose.

that's a lot of metal!


Again, I set up a stop so I could cut multiple segments of the same length without measuring every time.


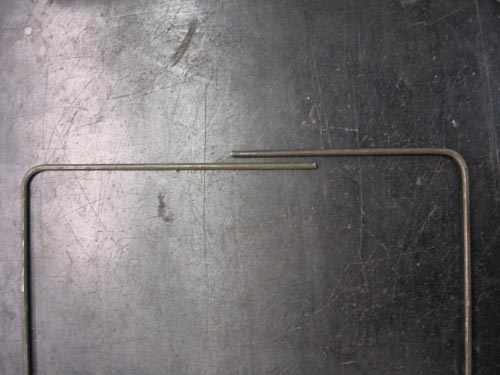
After cutting all the pieces, I need to put 45-degree ends on some of them to make perfect corners. I will make the top and bottom first, and then connect them with four vertical pieces.


The chop saw made decent cuts, but it isn't precise enough for my needs, so I use the grinder to get every angle perfect and fine-tune the length.


The pieces will go together like this.


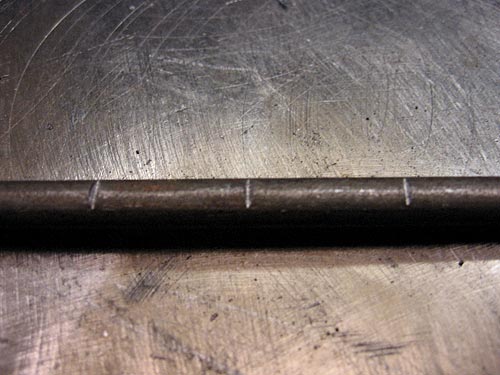
I bevel the edges a little bit, to make a space for my weld to fill.


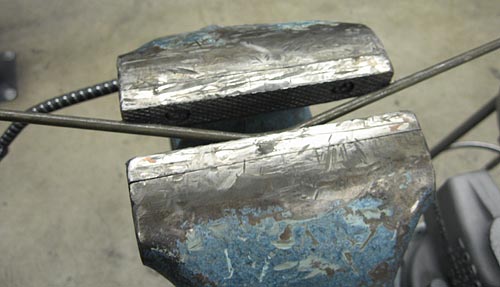
These German-made jigs are amazing. Tools like this make me happy. They are designed to do one specific thing well, and they get the job done flawlessly. Without them, this process would be a huge pain, but instead it is effortless.


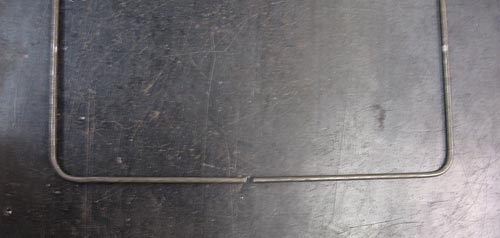
And there you go- the top and bottom of my frame.


I grind off the welding slag so the verticals will attach on a level surface...


...and hold it in the vice so I can grind down the corners.


And allow me to wax poetic about one more tool. If you're in the market for a handheld grinder, get this one. It uses oversized discs and has a more powerful motor. With a fresh disc it works FAST. It is very heavy, so if your work is above waist level your arms will give out quickly. But it makes all the smaller grinders in the shop feel like toys.

A productive session, and over the next few days the parts will start coming together. I'm going to be working fast!